The New Asset screen is used to enter a new asset into the database.
Note for Mobile Device Users: Assets can also be added on a Windows Mobile/CE mobile device.
The following topics are discussed in this section:
Accessing the New Asset Screen
Picture Tab
Maintenance Tab
Contracts Tab
Accessing the New Asset Screen:
To access this feature, from the Main screen select Asset Management > New Asset.
This feature can also be accessed from the Asset List by clicking the New Record button on the toolbar. For more information on using the list screens, click here.
The New Asset screen is broken into several tabs. Use the following links to jump ahead to the tab of interest:
General, Asset Linking, Depreciation, Attachments, Picture, Maintenance, Contracts, Transaction History, Custom Fields
New Asset Screen > General Tab

Note: If the Automatic Asset Tags function is turned on (Administration > Options), the Asset Tag field will appear.
You may notice that some fields on this and other tabs have a Pin icon in front of them. These fields represent data that can be "pinned". Pinning allows you to "lock" the information entered into a field. This is convenient if, for example, you are entering multiple new assets for a particular site and location. You can enter the site and location once, then pin them. The fields will retain the information you entered through each new entry until you unpin them. In the example screen shown below, values are entered in the Site, Location and Department Code fields. These three fields were Pinned by clicking on their ![]() pushpins, causing them to look like
pushpins, causing them to look like ![]() this. Click the pushpin again to unlock the field for entry of a different value.
this. Click the pushpin again to unlock the field for entry of a different value.
Click the Pin All icon to pin every field that offers the pinning feature. Click it again to undo pinning for all fields.
1.Enter information in the required fields. You must enter information in the Asset Tag, Asset Type, Site, and Location fields.
Note: If you are using Automatic Asset Tags, you do not need to enter anything in the Asset Tag field. The tag will be generated you click the Save button or when you click the button next to the Asset Tag field.
When you select an Asset Type, the following screen will display:
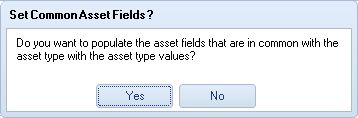
Select Yes to populate fields with information from the Asset Type. For example, if Check Out Length information is entered for the Asset Type, it will appear here.
Keep in mind that you can set the check out length to only consider weekdays and the due date to only fall on a weekday on the Options screen.
If you have enabled the Edit Inherited Asset Type Data option on the Options screen, you can make changes to the information that is populated from the Asset Type. If this option is not enabled, these fields will be disabled and you will not be able to make changes.
If you do not want to incorporate information from the Asset Type, other than the Asset Type number and Description, click No.
2.The Department Code, Serial No., Condition, Hyperlink and Additional Info fields are optional.
The Hyperlink field can be used to store a link to the manufacturer's website, or even to a location on your network. When a valid web address is entered in this field, the icon next to it will be enabled. Clicking the icon will open your web browser and access the website.
Note: When using the drop down lists to enter information in a field (Asset Type, Site, Location, etc.), the last few selections will appear in the list. If you want to search for an existing value, select <More> from that field's drop down list to access the List screen. Use the vertical scroll bar to select a record from the List and click the List dialog's Select button.
3.Click OK if you are done entering information for this asset or click on another tab to proceed with entering more information.
New Asset Screen > Asset Linking Tab
Asset Linking, also known as Asset Kitting, allows you to link two or more assets together to form one new asset. For a complete definition of Asset Linking and an example, please refer to the Definitions topic.
The Asset Linking tab allows you to create links:
1.The Asset Tag value entered on the General tab will be displayed at the top, but can still be edited, if desired.
2.If this asset is to be the Parent, or top-level asset, of this group, you can leave the "This asset is part of" field blank. If you want to give this asset a parent, select an asset from the drop down list.
The asset can have a parent assigned to it and be a parent (have child assets assigned to it).
Select <More> from the drop down list to access the Asset List. Remember, you can filter the asset list to only display "Top Level" assets, or parent assets, if needed. See the Working with Lists topic for further information.
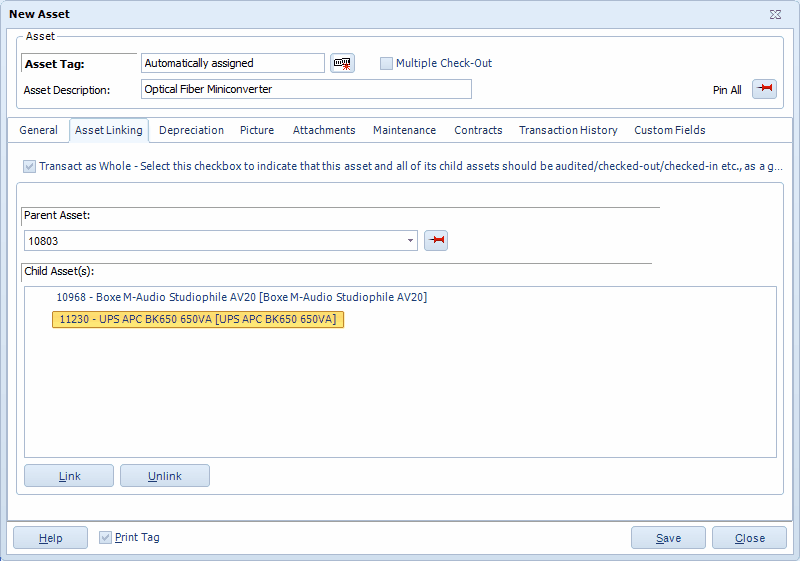
3.To associate child assets with this asset (the current asset will be the "parent" of these assets), click the Link button below the "This asset contains:" window. The Asset List will appear.
Highlight the desired asset in the Asset List, then click the Select button. The selected asset will appear in the "This asset contains" window as shown below:
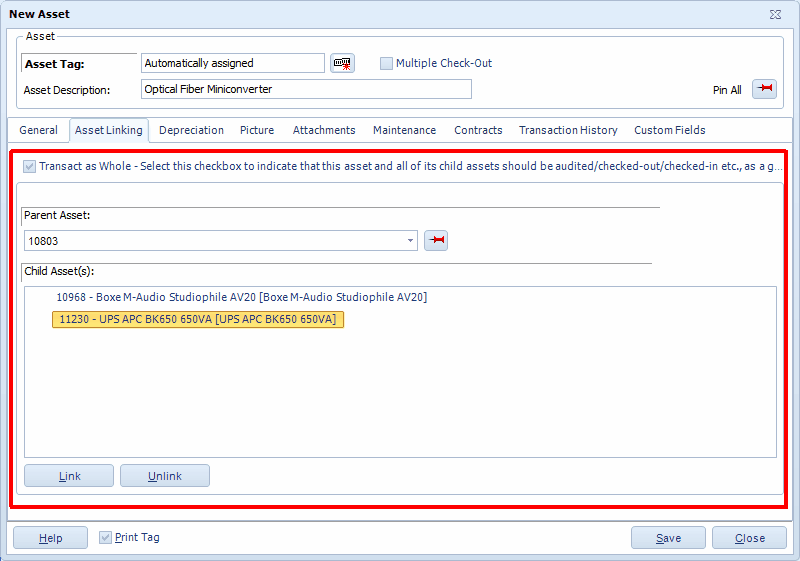
In this example, Asset 4002 is the parent of the current asset and asset 1005 is the child.
A Note about the Transact as Whole Flag: In the example above, the Transact as whole flag is checked; therefore, any functions (check-in, check-out, audit, move, etc.) will be performed as a whole for the group. This flag is driven from the top down, meaning the selection made for the parent asset will override the selection for a child asset. If you want to move only one asset that is a child of this asset, you will need to deselect this checkbox. Deselecting it on the Edit Asset > Asset Linking tab for the child asset (in this case, Asset 1005) will not override the selection made for this asset, and this group would still be moved as a whole. Similarly, if the Transact as whole flag was NOT selected on this tab, but it IS selected for Asset 4002 (the parent of this asset), the group would still be transacted as a whole because the selections made for the parent of this asset would take precedence. To put it another way, if you think of these relationships in the vein of child-rearing, one of your children may decide it is ok to borrow the car, but you as the parent do not think it is ok, and your decision would override that of the child.
Also keep in mind that when you check out an asset that has Transact as whole turned on and you select to use the Default Due Date (on the Check Out screen) Rosistem Assets will search all assets linked to the selected asset to find the maximum checkout duration. The software will use this maximum length to calculate the due dates for all the linked assets. This ensures that all the assets in the transaction have the same due date even if some of the linked assets have different checkout durations.
4.You can unlink child assets by highlighting the asset in the Associated Assets list and clicking the Unlink button.
5.Click OK if you are done entering information for this asset or click another tab to proceed with entering more information.
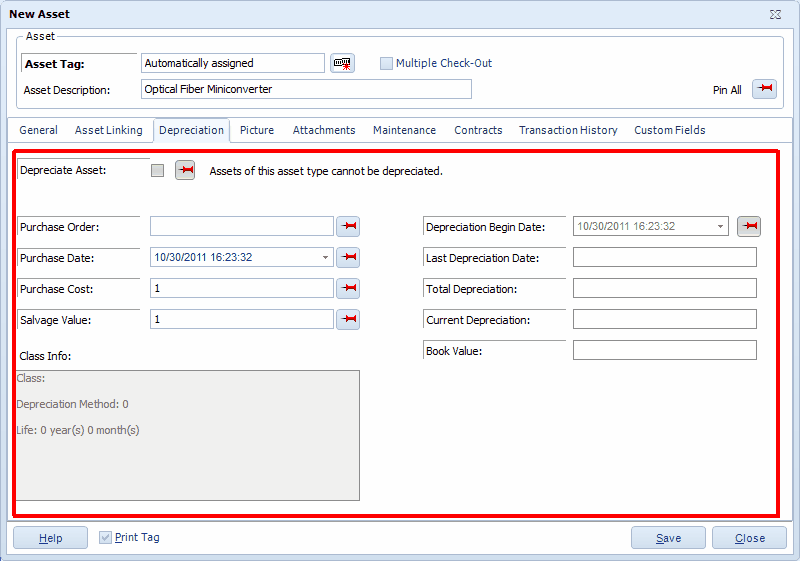
New Asset Screen > Depreciation Tab
Click the Depreciation tab if you want the software to calculate depreciation for this asset. The method used by the system to calculate depreciation is dependent on the Asset Type assigned to this asset.
1.The Asset Tag value entered on the General tab will be displayed at the top, but can still be edited, if desired.
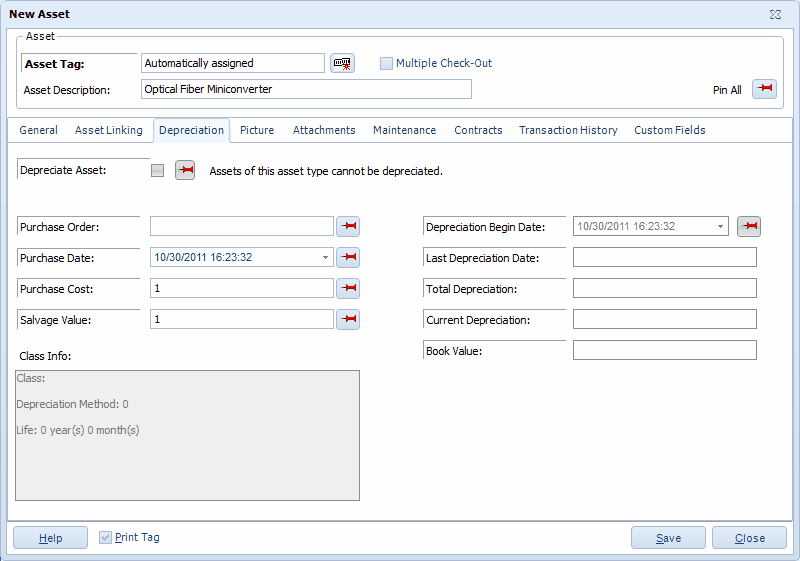
2.Click the Depreciate Asset checkbox if you want the software to calculate depreciation. The Depreciate Asset checkbox will be disabled if a Depreciation Class has not been defined for the Asset Type specified on the General tab or that Asset Type has a Depreciation Class, but its Depreciation Method is "None".
The depreciation method used for an asset is determined by the Depreciation Class assigned to the Asset Type. This information appears in the Class Info box and cannot be modified from this screen. If you want to change the Depreciation Method or the Life of a particular asset, you will need to make changes to the Depreciation Class assigned to the Asset Type, or create a new Depreciation Class to assign to the Asset Type. See the Depreciation Class help topic for further information.
3.Purchase Cost and Depreciation Begin Date are required fields when Depreciate Asset has been enabled, therefore, you must complete them if you want to calculate depreciation. These two fields are used in the calculation. Please see the Definitions topic for detailed explanations of each Depreciation Method.
4.Purchase Order, Purchase Date and Salvage Value are optional fields. If a Salvage Value is not specified, the Calculate Depreciation function will assume a Salvage Value of zero dollars.
The Class Info, Last Depreciation Date, Total Depreciation, Current Depreciation, and Depreciated Value cannot be modified. Information is populated in these fields by the system as depreciation functions are performed.
In the following example, an asset is being entered that uses linear depreciation:
5.Click OK if you are done entering information for this asset or click the next tab to proceed with entering more information
New Asset Screen > Attachments Tab
To attach an image or other documentation to this Asset, click on the Attachments tab:
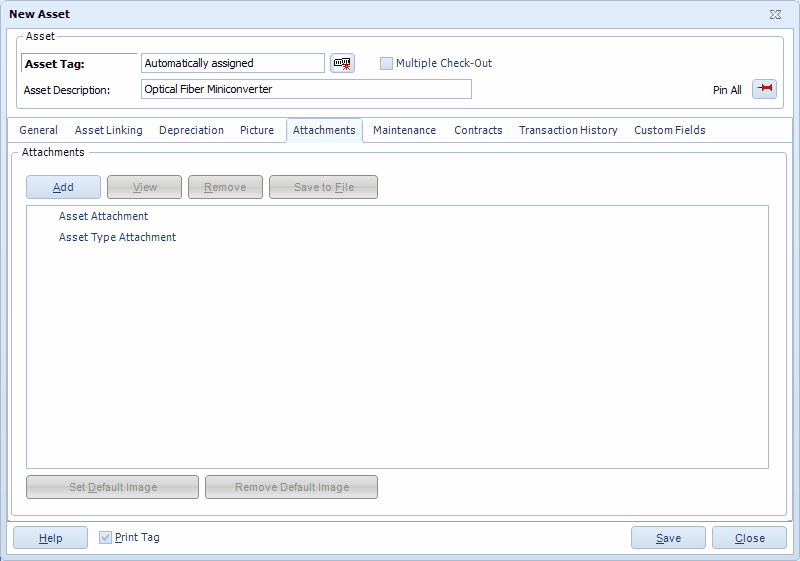
1.To add an attachment, click the Add button. A screen will appear allowing you to navigate to the desired file on your computer. Attachments are copied to the Rosistem Assets database from the external source you browse to when you click the Add button. Any change made to the external source file after adding the attachment will not update the attachment in the database. To update the database with a later version of an attached file, you must first Remove the attachment from the database, then Add the file again.
![]() Asset Attachments relate only to the specific Asset being recorded. Asset Type Attachments relate to every Asset recorded for this Asset Type.
Asset Attachments relate only to the specific Asset being recorded. Asset Type Attachments relate to every Asset recorded for this Asset Type.
2.If you have attached an image, you can designate this the "default" image (meaning this is the image that will appear on the Picture tab) by clicking the Set Default Image button.
3.After you have added at least one file, the View button is enabled. This feature allows you to view the attached file. The File Associations defined in Windows Explorer determine which application will be started to open files, based on their filename extensions. On most machines, a PDF file would be opened by Adobe Reader, for example. Image attachments can be viewed the same way or you can use the Picture tab to use internal image viewer.
The Save to File button copies the selected attachment from the database to any drive and folder available on your system.
The Remove button can only be used to Attachments. It is grayed-out (disabled) when an Asset Type Attachment is selected. These Asset Type Attachments may be related to other Asset Tags under the same Asset Type. Asset Type Attachments can only be removed via the Edit Asset Type Attachments tab (see Create New Asset Type for further information).
4.![]() Attachments are not actually added to the database until the OK button is clicked. You can click it at this time if you are finished adding additional information, or click it later, after you have completed information on other tabs.
Attachments are not actually added to the database until the OK button is clicked. You can click it at this time if you are finished adding additional information, or click it later, after you have completed information on other tabs.
New Asset Screen > Picture Tab
Click the Picture tab to view any image files that have been Attached to either the Asset Type Attachments folder or the Asset Attachments folder:
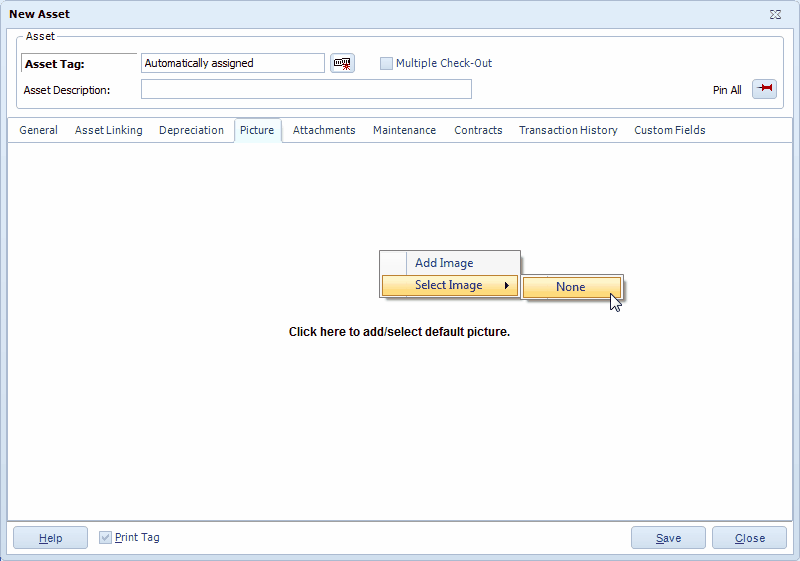
1.The first time you access this tab, click on the picture area to add a picture.
The current default picture is always displayed on the Picture tab. Right click the image to see the popup Picture menu. This menu allows you to Add (a new) Image or to Select (a previously added) Image. Any image you select for display will become the new default image.
![]() The files listed in the Select Image sub-menu are a combination of Asset Type Attachment images and Asset Attachments images, sorted alphabetically, by filename.
The files listed in the Select Image sub-menu are a combination of Asset Type Attachment images and Asset Attachments images, sorted alphabetically, by filename.
2.Image files are not actually added to the database until the OK button is clicked. You can click it at this time if you are finished adding additional information, or click it later, after you have completed information on other tabs.
New Asset Screen > Maintenance Tab
The Maintenance tab allows you to define maintenance procedures, a maintenance schedule, and warranty information for an Asset.
This tab allows you to:
Enter New Maintenance Schedules
Edit Existing Maintenance Schedules
Below is an example of the Maintenance tab:
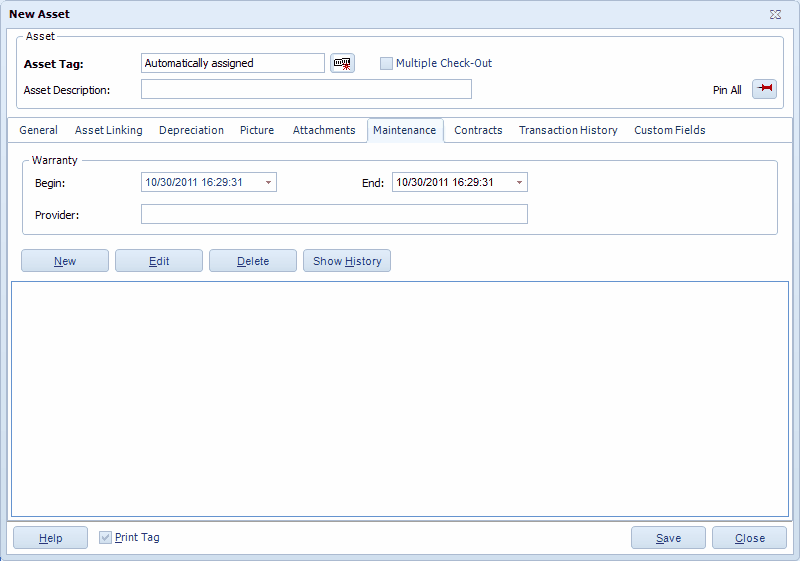
Entering Warranty Information:
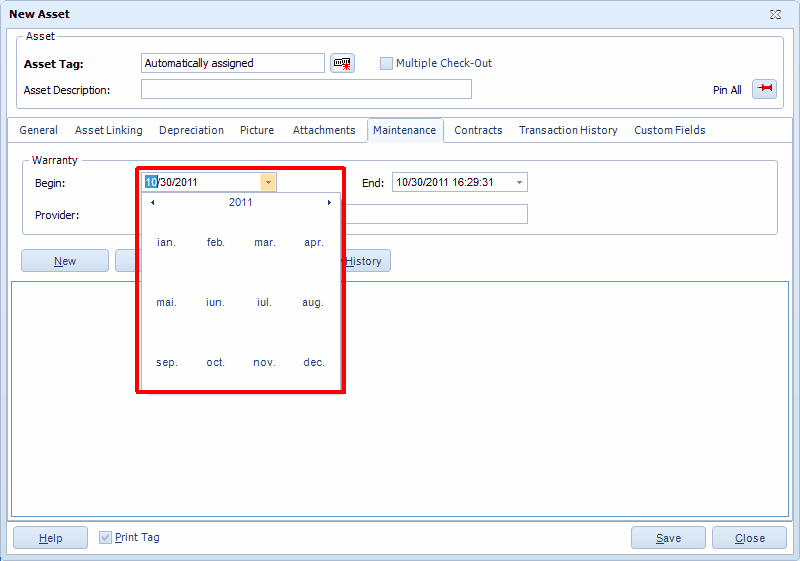
1.You can optionally enter Warranty Begin and End date at the top of this tab.
Click on the Calendar icon to access the calendar feature:

You can also click on the Month/Year (November, 2010 in the example above) to view a list of all months. You can then click on a month to quickly switch dates:
2.You can optionally enter the warranty provider in the Provider field.
Entering New Maintenance Schedules:
1.To enter a new maintenance schedule:
2.Click the New button below the window:
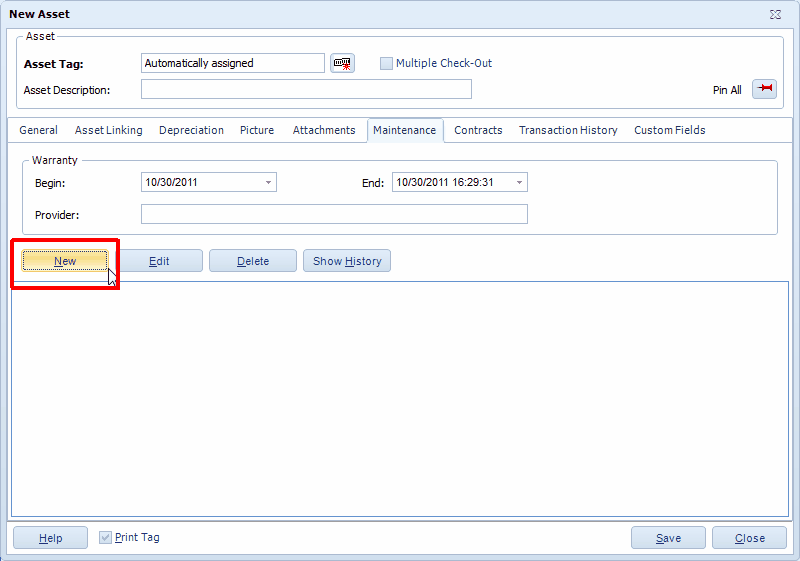
The Maintenance Schedule screen appears:
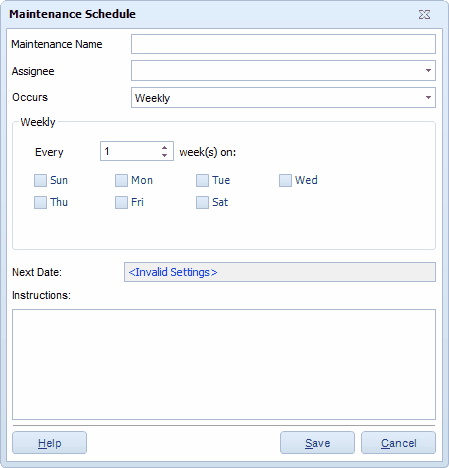
3.Enter a name for this maintenance schedule.
4.Select the employee who this asset will be assigned to from the Assigned To drop down list. All employees current set up in your software will appear in the drop down list.
5.Select how often this maintenance schedule is to happen from the Occurs drop down list. The area below the Occurs drop down list will change depending on the selection you make here. Your options are:
·Date - This option indicates a one-time maintenance procedure. When you select this option, a Date field will appear below the Occurs drop down list.
Select the date on which the maintenance should take place. You can click on the calendar icon to select a date or type a date directly into the field.
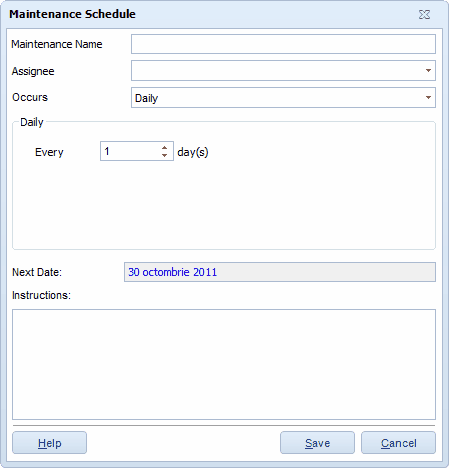
·Daily - This option allows you to specify a Maintenance Start date, followed by a frequency specified as Every x number of days (up to a maximum of every 366 days).
The Next Date at the bottom of the screen indicates the next date maintenance will be performed on this asset.
·Weekly - This option allows you to specify a Maintenance Start date, followed by the frequency specified as Every x number or weeks. You will also select the days of the week on which the maintenance is to be performed. More than one weekday can be selected.
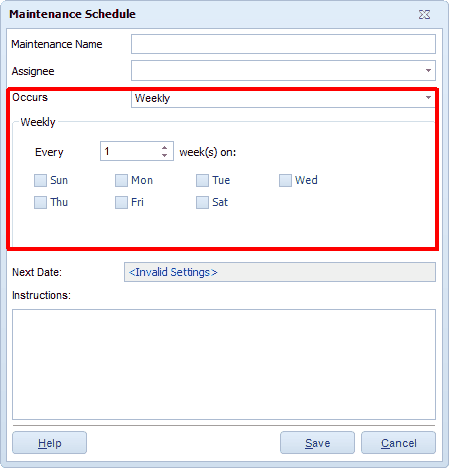
The Next Date at the bottom of the screen indicates the next date maintenance will be performed on this asset.
·Monthly - This option allows you to specify a Maintenance Start date, followed by your choice of two possibilities: Maintenance Every x number of months (up to a maximum of every 99 months) as shown below:
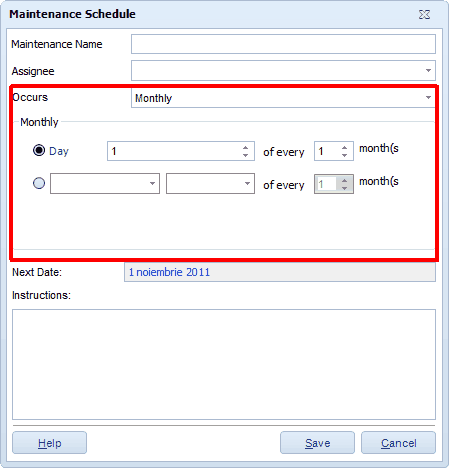
In this example, maintenance will occur on the 1st day of each month every month.
Notice the Next Date reflects the first day of the next month.
OR
Maintenance can be set to occur on a specific weekday of every x number of months (up to a maximum of every 99 months) as shown below:
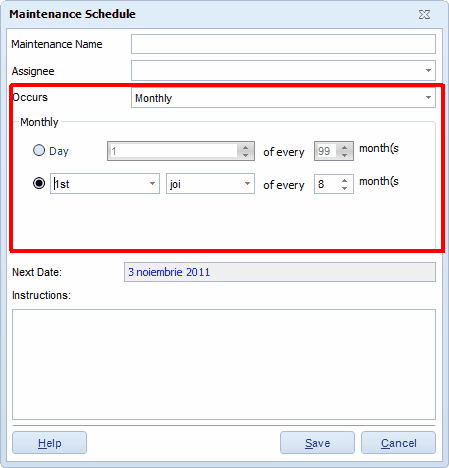
In this example, maintenance will occur on the first Thursday of every month.
Notice the Next Date reflects the first Thursday of the next month from the Start Date.
·Disable - This option is used when you want to temporarily disable an existing maintenance schedule. Highlight the maintenance schedule in the list, then click Edit. On the Maintenance Schedule screen, select Disabled from the Occurs drop down box. You can also set up a new maintenance schedule as Disabled then enable it later by select Daily, Weekly, etc.
·
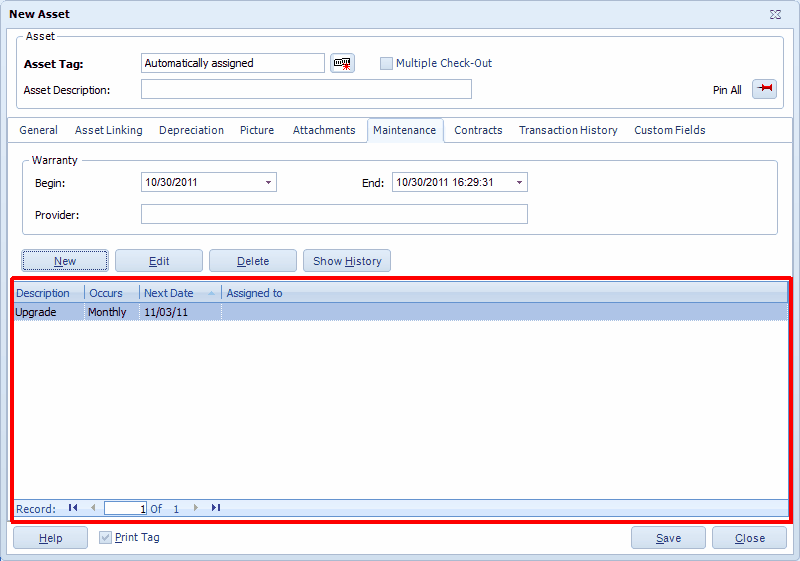
6.Click Save when you are done entering information for this maintenance schedule. The schedule will appear in the list on the Maintenance tab:
Editing Existing Maintenance Schedules:
1.Highlight the maintenance entry you want to edit, then click the Edit button. The Maintenance Schedule screen will appear populated with the selected entry's information.
2.Make changes as necessary, then click the Save button. The edited entry will appear in the list on the Maintenance tab.
The Maintenance History screen displays all completed maintenance on this asset.
1.Click the View History button. The Maintenance History screen will appear:
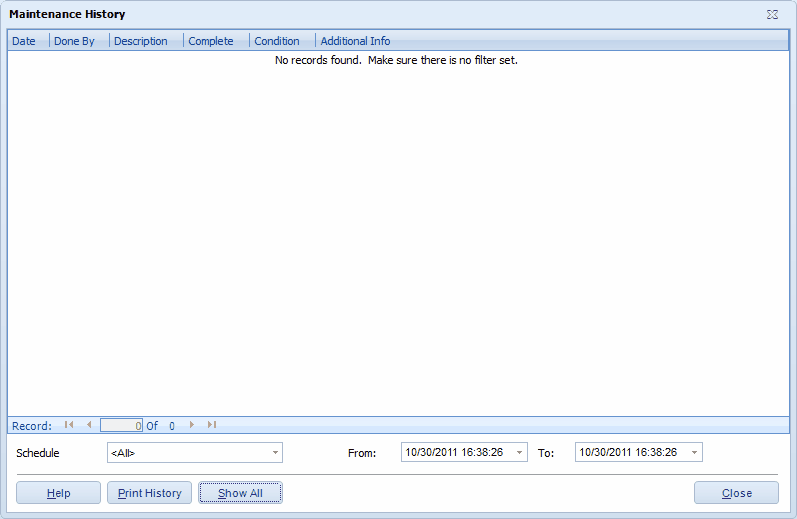
2.When you first access this screen, all maintenance entries associated with the selected maintenance schedule are displayed. You can change the selected schedule using the Schedule drop down menu. You can also enter From and To dates to further filter the list.
Click the Show All button to remove the filter.
Select the Print History button to print a list of the displayed maintenance entries.
New Asset Screen > Contracts Tab
The Contracts tab allows you to record contract and/or software licenses associated with this asset. The tab will appear empty when you are first adding a new asset. You can add contracts and licenses to this asset as needed from this tab. Contracts/licenses can be added to the database via the Contracts List screen.
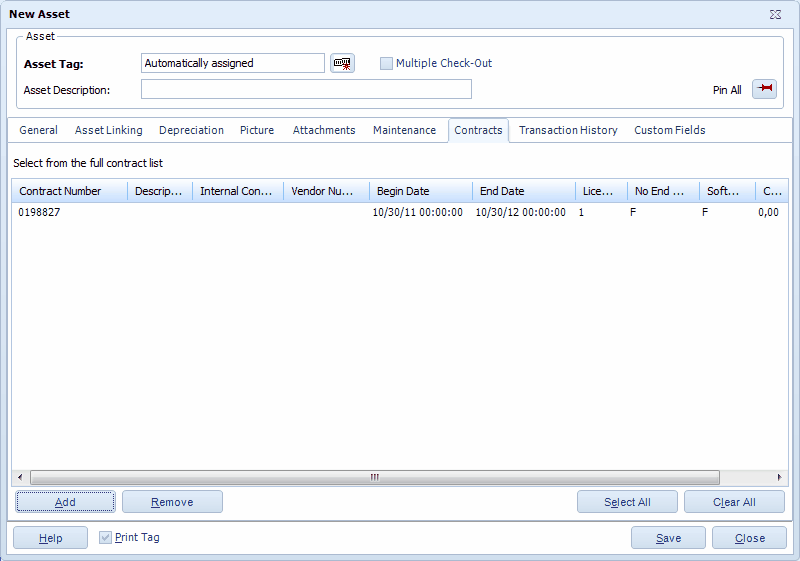
1.To add a contract/license, click the Add button. The Contracts List will appear. Select the desired contract from the list, then click Select on the Contracts List screen. The selected contract will appear on the Contracts tab as shown in the example below:
2.You can remove a contract by highlighting it in the window, then clicking the Remove button.
Click Select All to select all contracts in the window.
Click Clear All to deselect all contract in the window.
3.Click OK if you are done entering information for this asset or click the next tab to proceed with entering more information
New Asset Screen > Transaction History Tab
The Transaction History tab displays data only after one or more Asset Management transactions have been performed (check-in, check-out, etc.).
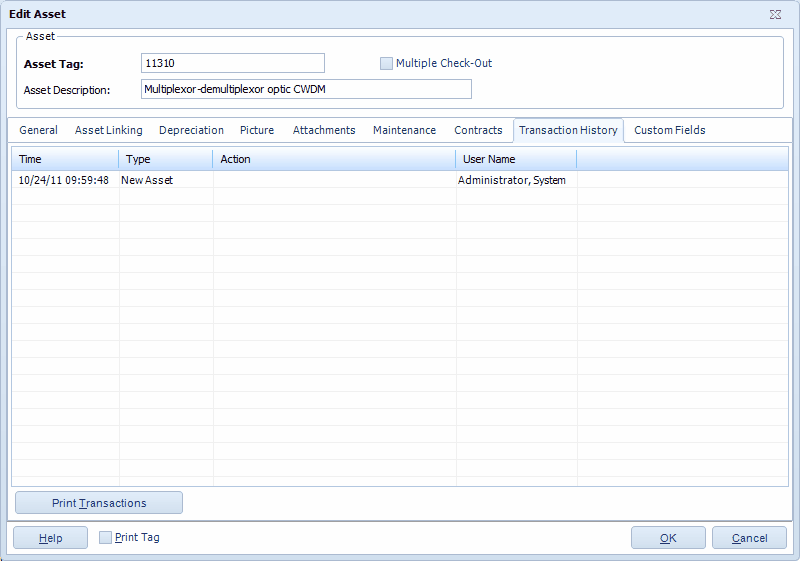
1.Click Print Transactions to send a list of the transactions for this asset to the printer.
2.Click OK if you are done entering information for this asset or click another tab to proceed with entering more information.
New Asset Screen > Custom Fields Tab

Please refer to the Using Custom Fields topic for instructions on creating custom text, number and date fields.
![]() If the Close New Form option is enabled on the Options screen and no fields are pinned, the screen will close when the OK button is clicked.
If the Close New Form option is enabled on the Options screen and no fields are pinned, the screen will close when the OK button is clicked.